
We’re thrilled to announce that Glorify is officially partnering with Contra! This collaboration opens up exciting opportunities for designers, marketers, and creators in the Glorify community.
Posted Jan 9, 2023
•
10 mint read

Design

Create beautiful marketing graphics at scale.
How To Create Mockup Templates: 5 Techniques To Create Mockups in 2023

What are Product Mockups?
Product mockups are the closest you can get to see what the finished design will look like. They are visual representations of your design. Thanks to product mockups something that started as a vague idea turns into something much more tangible.
Mockups are most popular in product-led industries. It comes as no surprise since the visual element plays such an important role here. There has to be a visual, graphic appeal to draw clients to a certain product. These mockups cover a big range of areas like home accessories, fashion, garden accessories, books, technology, website creation, etc.

This is not, however, the only area where mockups are in high demand. Graphic design agencies, and web or app developers, all depend heavily on mockup use. And the list doesn’t stop there. Engineers, architects, and even scientists use mockups to be more efficient and effective.
Regardless of the industry, mockups’ biggest appeal is that they speed up the process and significantly reduces costs and mistakes. Mockups enable quick editing and tailoring of a design to meet all the necessary requirements and needs.
Device Mockups are great for SaaS and tech companies when the accent is on visualizing UX or service on different tech devices

glorify-product–mockup-feature-page-virtual-products-phone-display
Branding Mockups: In order to visualize your logo or branding elements better, this type of mockup is excellent. You can visualize what these elements will look like on your brochures, business cards, stationery, notebooks, etc.

glorify-product–mockup-template-for-brands-mugs-bags
Packaging Mockups: If we can say one thing about packaging, it would be don’t underestimate the power of an attractive package. Give an extra kick to your packaging design while playing with packaging mockups. See how your design will look on a box, paper bag, bottle, container, etc.

Glorify-ecommerce-product–mockup-template
Print Mockups: All sorts of flyers, postcards, (book) covers. In short, any type of paper format

glorify-print-product–mockup-template-clothes
Product Mockups: We already mentioned that these are THE most popular mockups because they cater to the largest audience. Toys, clothes, accessories, anything you can think of that doesn’t fit in the other categories, you’ll find it here.

glorify-product–mockup-template-chocolate
Now that we’ve covered different types of mockups, let’s check the best techniques to create mockup templates and mockups in general.
The Best Techniques to Create Mockup Templates

It would be wrong to assume that in order to create mockups it is just enough to assemble some random /designs together, and “voila” you ended up with a perfect mockup. If you want to create the most realistic mockup ( by realistic we mean coming closest to the appearance of the finished design), you need to tell the story, create a great setting and pay attention to all the details that will “seduce” a potential client. This is precisely where various techniques come to the rescue. So without further ado…
1. Use Glorify Mockup Tool
What sets Glorify apart from other mockup tools is that it pays great attention to eCommerce shop owners. That is not that common, if at all. It is a Saas design tool that allows you to create professional and beautiful designs that drive conversions. It is something like Photoshop meets Canva.
If we break creating a mockup on Glorify into steps, it will go like this:
Step 1: Choose Ideal Mockup for Your Project

You don’t have to start from scratch. It takes a lot of time and stress, especially if you are a novice to this. Glorify has a library with thousands of templates. Just take your pick. Of course, if you are more experienced you can also choose a blank canvas and unleash your creativity.
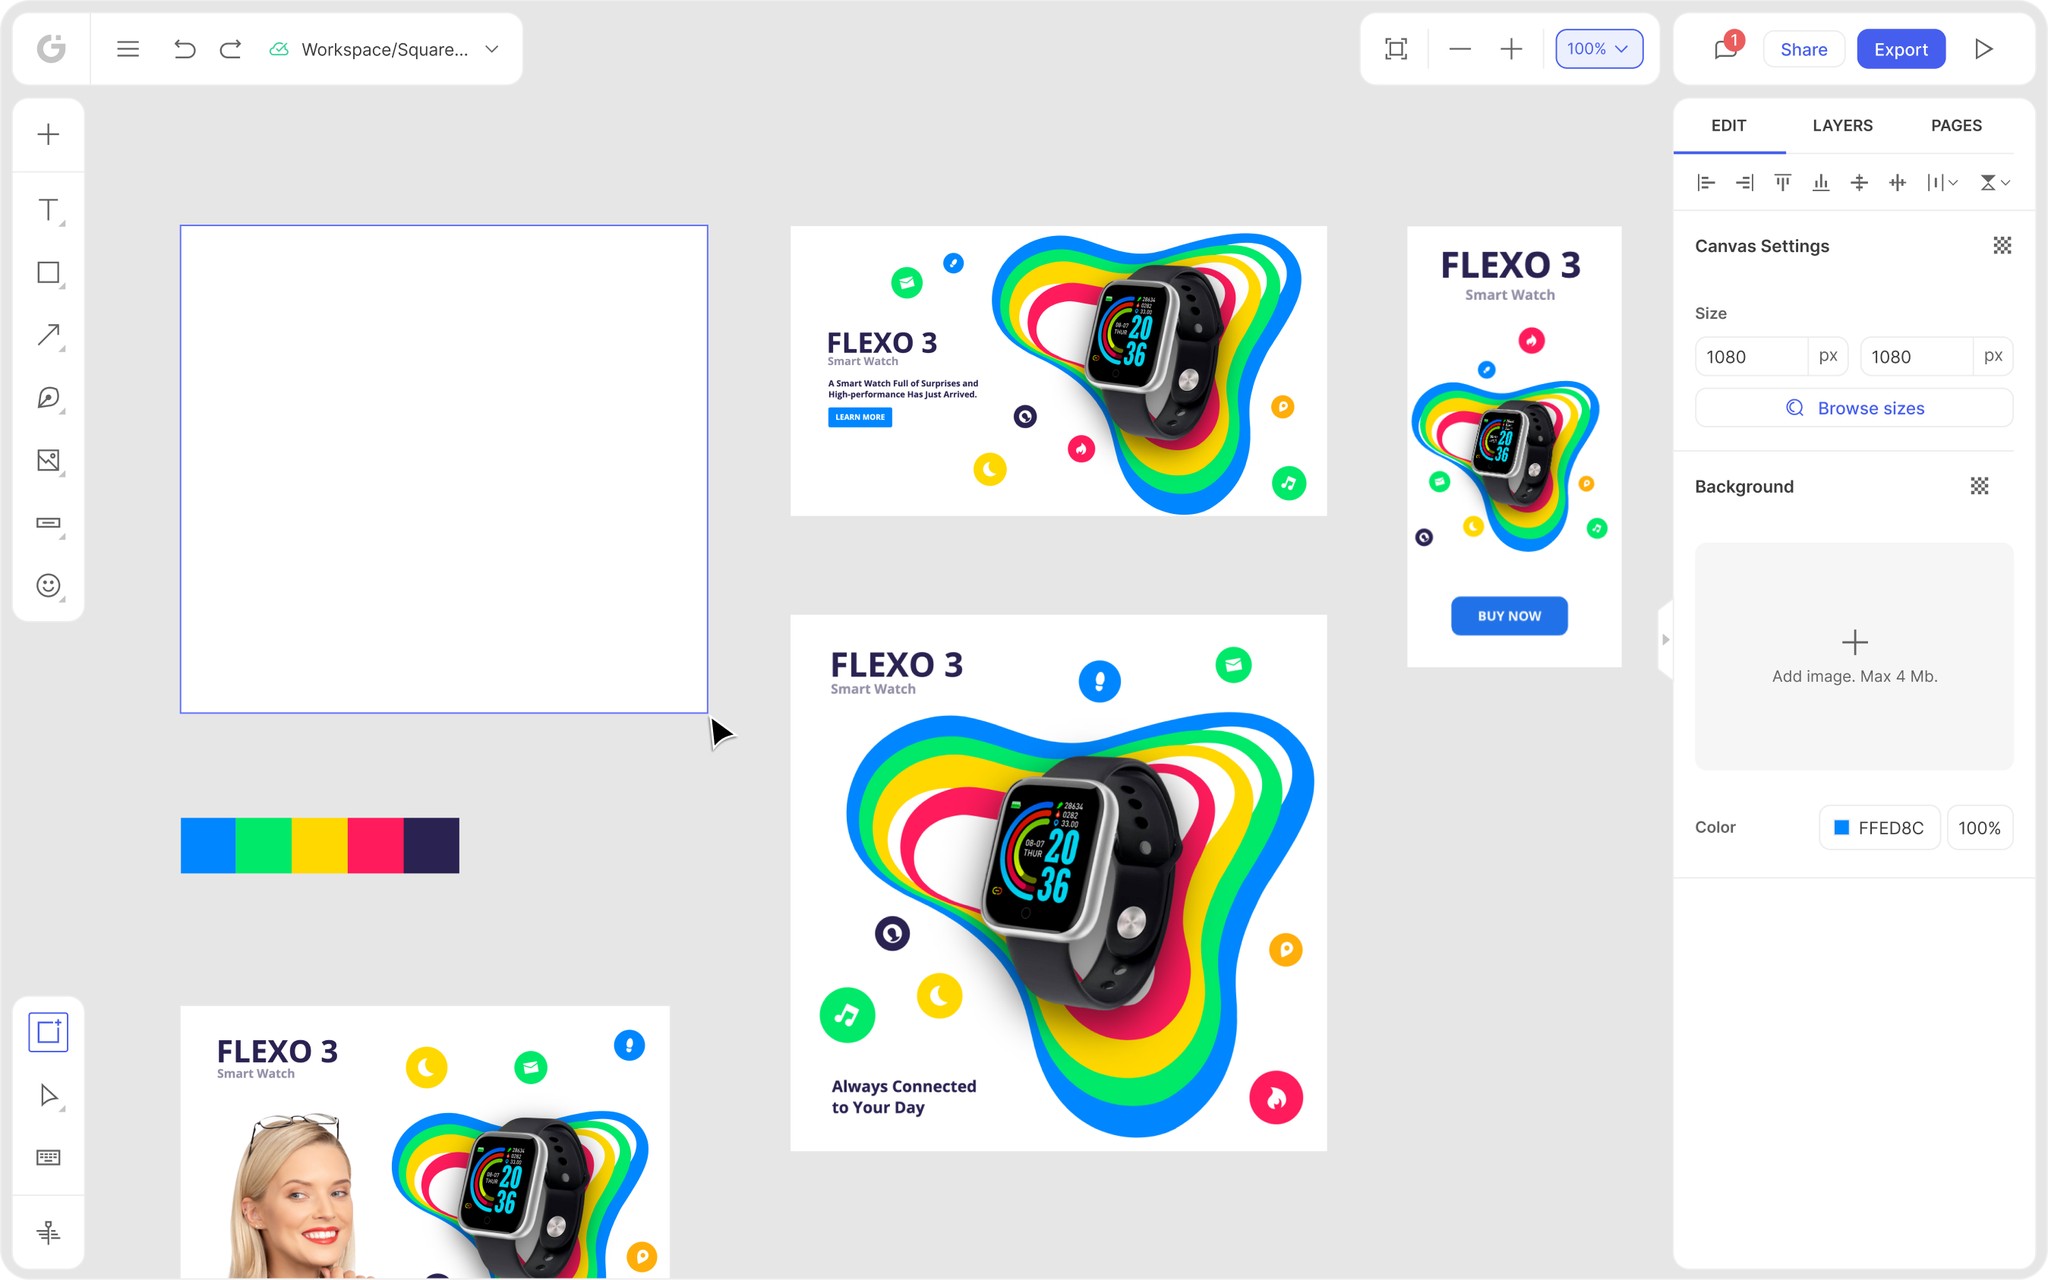
Step 2: Customize Your Template
The next thing on the agenda is to start playing around with the various features and edit options.

On the left, you can see the menu with all the tools you need to start making your mockup: photos, icons, textures, special effects, graphics, etc. That’s when the true fun begins.
Step 3 Collaborate, Organize and Share
Once you’ve finished you can easily share your design with your team. Then you can export the design to your computer or upload it to your website or store. And let’s not forget about social media. You can share your design there, too.
A downside would be that the template base isn’t as big as at some other websites, but the new templates are added on almost everyday basis and there will be many more to come
2. Creating Mockups from Scratch
A complete opposite to the previous tool would be to create your mockup from scratch. This is definitely something for more advanced designers. It takes a lot of time and effort. What makes it great yet challenging is that you can truly create a unique mockup, the one that definitely hits your target audience and sets you apart from the competitors.
It is worth mentioning that this mockup is only “profitable” if it is really unique. If you end up with something that looks like a random template, it is definitely time, money and effort wasted. The first thing that you will need is an original photo. This immediately brings a sense of uniqueness. It will be a photo that is really specific to your niche.
Starting from scratch can be rewarding for ecommerce store owners for example if they want to do packaging mockups. They have so much room to play and give the packaging that original touch.
Designers, on the other hand, can either take a photo themselves or hire a professional photographer (not recommended if you are on a tight budget). What they can also do is actually use their client’s photos. There is a big chance that these photos aren’t of the highest quality, but when creating from scratch you are more interested in staying unique and authentic.
The next step would be to join the design and the photos. One of the most popular tools for that is Adobe Photoshop. With it and similar tools, you can edit, blend, adjust and layer.
This technique of creating mockups from scratch has disadvantages: time, cost, effort, and one-time use.
It is still a great technique if you don’t mind investing time and money and if you want to create something authentic.
3. Use Photoshop

The process of creating any type of mockup is pretty much the same. For starters, you need high-quality pictures. There are great free sites such as Freepik, Unsplash, etc. that are popular and where you can really find almost everything. Especially loads of mockup templates.
When you choose your photo then you need to prep it before using Photoshop. Depending on which software you are using, the process should go something like this:
Choosing the shape
Setting the size and format
Saving any changes
After this, you will be ready to import your work to Photoshop. Use the “Magnetic Lasso” tool to find every section of the image where you would like your work to go. Once you nicely put it in the selected area, you need to click on “Convert to Smart Object”. Do the necessary adjustment so your work fits the object. If you want the design to blend in more naturally you should choose “Multiply blending mode”. It might need a bit of tweaking for you to be fully satisfied, but the core of your mockup is done.
It is worth mentioning that Photoshop isn’t the best option for beginners because it requires pre-knowledge and is time-consuming.
For using mockup plugins you need some knowledge about its functions to create your own designs, and with mockup websites, there is a bunch of repetitive mockups, that many of them are using.
4.Mockup Creator Software Plugin
Mockup plugins are third-party integrations. They connect with design software to make mockups. In a nutshell, these apps are very practical because designers can design and create mockups in the same program. They also allow for additional editing once the mockup is ready.
One of the biggest benefits of these plugins is that they come at a low cost and in general, they are time-savers. Sketch, Figma, and Adobe XD are just some apps that are connected to these plugins.
Each site has its own instructions on how to download and install plugins. Once you install it, you can apply the design you worked on to a mockup. After that, your mockup will automatically be created, and then of course you can use various tools to customize and finalize your work.
Although the mockup would differ little from the one from online mockup generators, using plugins is a good technique in terms of money and time-saving. You also don’t need to have strong technical knowledge but bear in mind that each plugin functions differently.
5. Mockup Generator Websites
These websites are really very popular because they are user-friendly and allow less tech-savvy people to enjoy using them. They are also cheap, you can even go quite far with the free version. The disadvantage is that the mockup will be quite generic. However, they are a good solution if you are in a nick of time.
Depending on your niche, there are specialized mockup generator websites. They specialize in certain types of mockups. On the other hand, Renderforest and Placeit, for example, offer general mockup templates for both print and digital products so they are widely used. Let’s see what the mockup creation looks like on Placeit.
Once you are at Placeit, you go to the Mockups tabs
You then get to choose which type of mockup you’d like: T-shirt, iPhone, hoodie, etc.
After that, you should click on Upload Screenshot and select the image for your product
Now the editing begins: resize and crop your image to fit the desired format
In a few moments, your design will be uploaded to all the mockups available.
When you choose the one you like, you just need to click on Download and your mockup is ready.
Even in this final stage, you can still make minor edits, such as changing the background color, for example.
Let’s Sum It Up
Whether you are in search of more generic or more specialized mockups, they are undoubtedly helpful and time-saving resources. Their vast range of use combined with creativity and a bit of design skill is extremely powerful when it comes to marketing and selling. The beauty lies in the eye of a beholder, so knowing your audience and knowing what would attract them most is a huge step in creating that one “perfect” mockup.
That is why we created Glorify Mockups. To save time and money to ecommerce owners so they can easily create high converting product images even if they don’t have any design skills. Glorify offers plenty of tools and resources suitable for e-commerce to make higher conversions and boost your marketing activities. All in one place while having so much fun.
Create your free account now and enjoy the ride.


Features
Alternatives


© 2019-2024 Glorify App - All rights reserved.