


We’re thrilled to announce that Glorify is officially partnering with Contra! This collaboration opens up exciting opportunities for designers, marketers, and creators in the Glorify community.
What's Linkedin Business Page Cover Photo Size For 2023

What is a LinkedIn Cover Photo?
A LinkedIn cover photo, or a LinkedIn banner, is a photo that appears at the top of your business page. It is the background photo with your company’s logo in front of it.

And although the LinkedIn business page cover may seem trivial or insignificant, it has multiple purposes.
What’s the Purpose of a LinkedIn Business Page Cover Photo?
In a nutshell, the purpose of a LinkedIn business page cover is to grab attention.
You can think of it as a billboard for your business.
Thus, it gives you a great opportunity to inform the audience of your line of work.
What are some of the information you can include in your cover photo? You can
Highlight your skills
Share your contact information
Share the link to your website
Share your last professional achievement
Show your newly released product or new service
Have a CTA, etc.
It would be a pity not to use this visual message. Whatever you decide to put, let it be a kind of invitation for people and other businesses to find out more about you.
And remember, the worst thing you can do is to leave this space empty and use LinkedIn’s default banner.
However, if you lack inspiration or still don’t know where to start, make sure you read our blog 3 Tips To Design a LinkedIn Banner For Your Business.
Now that you have a clearer picture of the type of info you can include, let’s check the technical requirements.
Linkedin Business Page Cover Photo Size
Regarding the Linkedin Business page cover photo size, the recommended size is 1128 x 191 pixels. It should have a 129:8 aspect ratio, and its size can’t exceed 8 MB.
Furthermore, a photo must be PNG or JPG file.
As far as the company logo size is concerned, LinkedIn recommends 300 x 300 pixels.
Apart from the photo size, you also need to pay attention to the edges of your cover photo.
Since LinkedIn business cover photos are available on multiple devices and screen sizes, your cover image may be horizontally or vertically trimmed to fit the screen. Therefore, upload a high-quality image that is predominantly text-free in the corners to ensure an optimal display on all devices and screen sizes.
So always check how a cover photo looks on different devices. Here comes another small but important detail to bear in mind. As you know, your logo is displayed in front of the cover photo regardless of the background color. However, if your logo is transparent, LinkedIn will show it on a white background. That is why it is always good to test your logo to see how it works on dark and light backgrounds. And although it isn’t the topic today, it doesn’t hurt to mention the size requirements for a personal profile on LinkedIn.
LinkedIn profile picture size should be 400 x 400 pixels, whereas LinkedIn banner photo size should be 1584 x 396 pixels. Now that we have this technical part out of the picture ( no pun intended), it’s time to get creative and see how easy and hassle-free you can get the perfect LinkedIn Business page cover photo size.
How to Adjust your LinkedIn Business Page Cover Photo Size?
Gone are the days when you had to adjust every photo for every platform and marketing campaign manually. Recent years have given birth to many graphic design tools that automate the whole resizing process.
Unfortunately, most of them require subscriptions to use a smart resizing feature, but luckily for you, there are some where you can do it for free.
One such tool is Glorify.

Glorify is a graphic design tool that helps eCommerce store owners and non-designers create converting visuals. We’ll talk about Glorify in detail a bit later, but let’s first check Glorify in action.
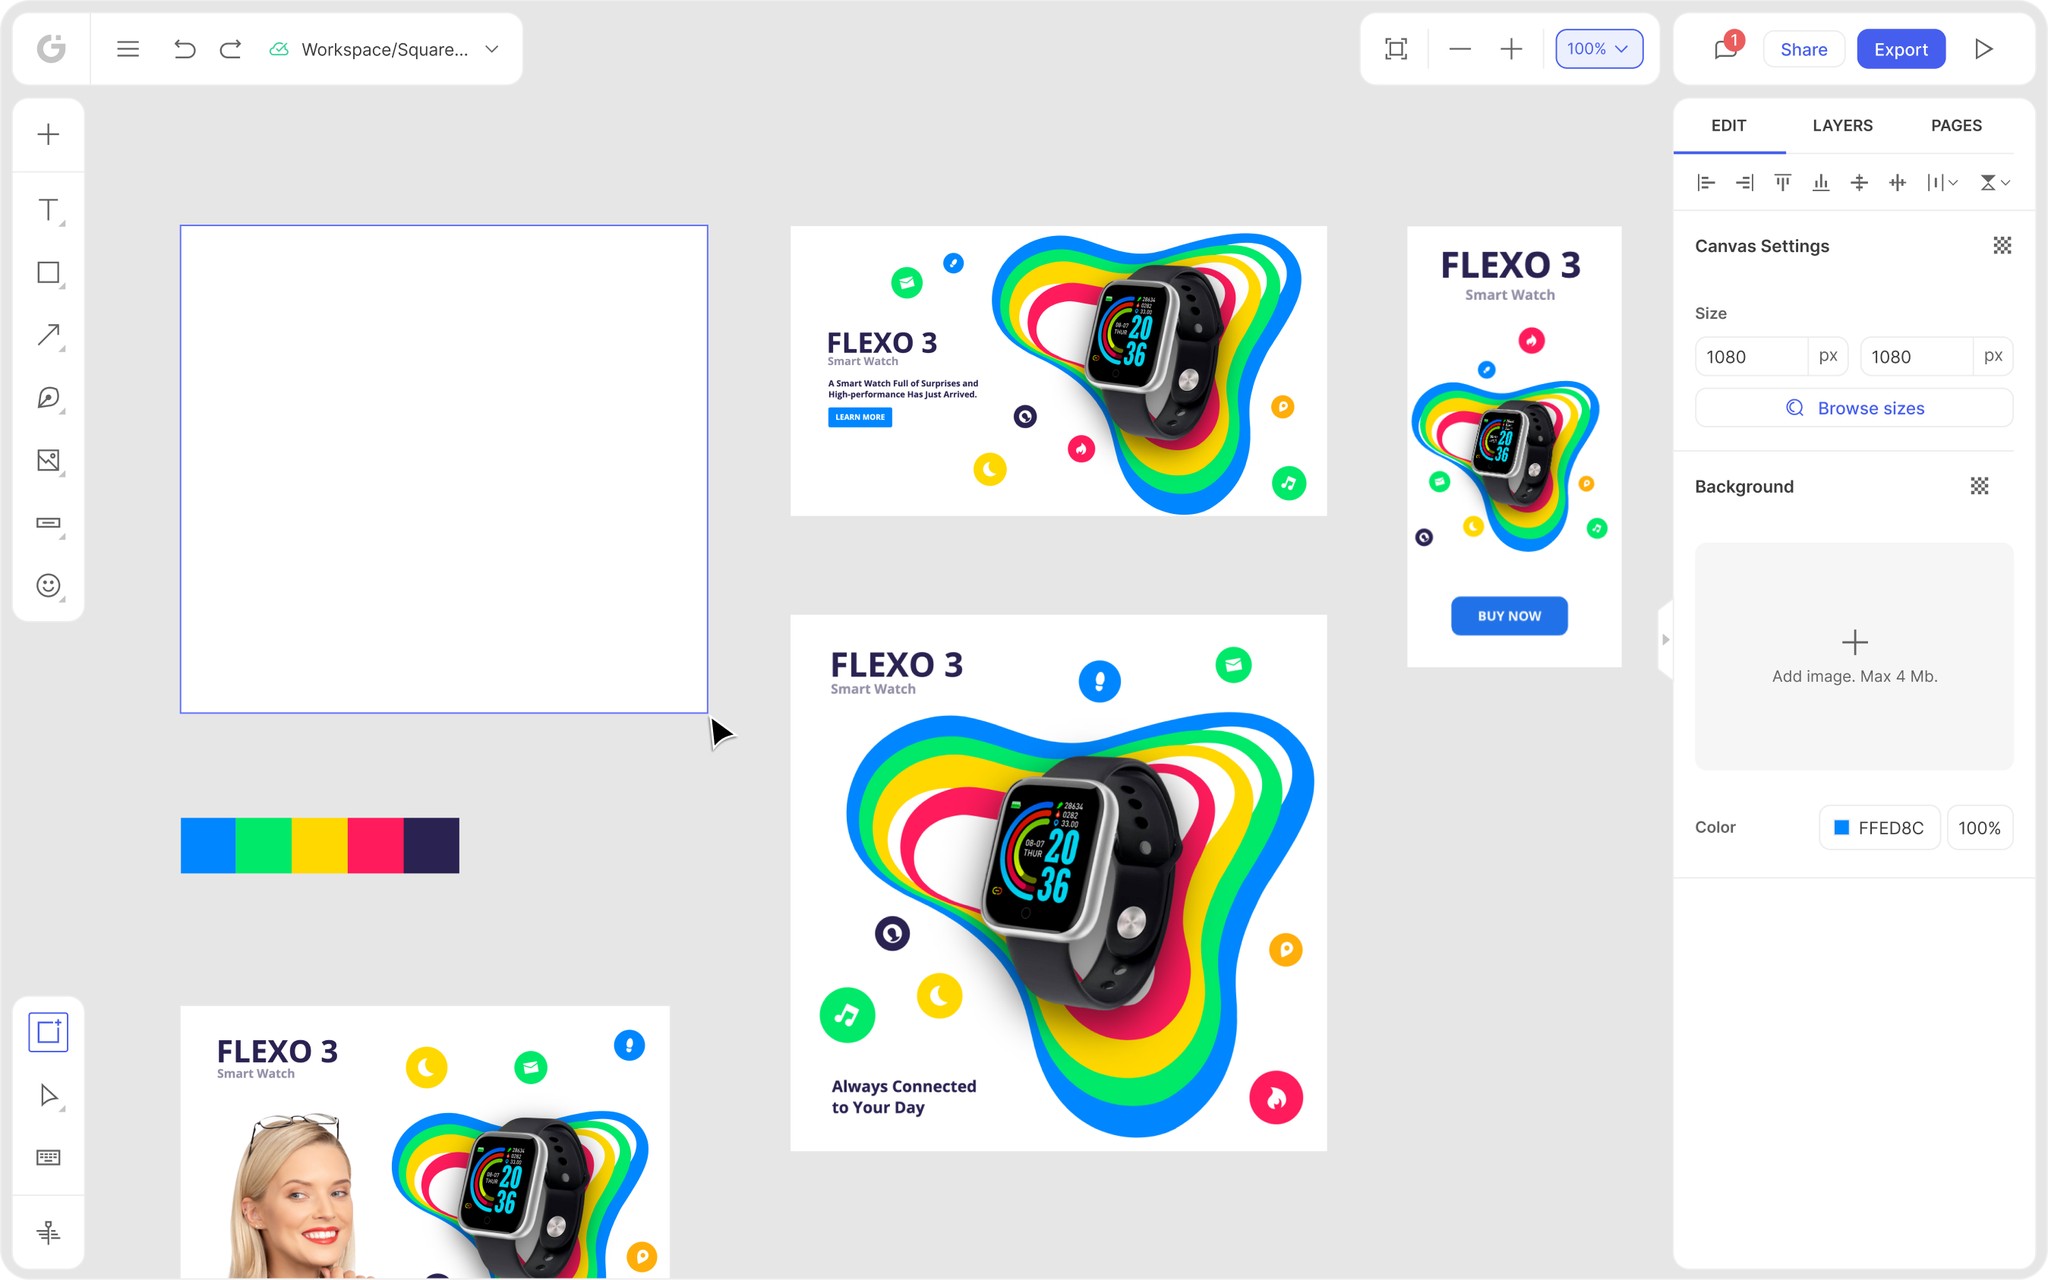
Step 1: Choose a Template
Upon free sign-up, you’ll be able to explore Glorify’s Template Gallery.

There are hundreds of templates to browse through, and when you click on the one you like, you’ll land on Glorify’s dashboard. This is where you can unleash your creativity.
Another great thing is that many of Glorify's templates come in bundles - already pre-sized variants of an image so you can instantly use them across social media platforms and for marketing campaigns. By pairing these templates with email outreach tools, you can create and send visually stunning emails that grab attention and drive engagement, making your marketing efforts even more impactful.
Step 2 Edit and Customize Your Template
Glorify’s dashboard is really intuitive and has a clean design. In addition, it has two panels that contain all the editing features and tools.

In the top right corner, you’ll see the size chart, where you can either enter the size you want or you can choose from the drop-down menu.
In either case, the image will automatically be resized.
The left-side panel hosts features like:
Stock images
Shapes
Lines and arrows
Effects and textures
Brand kits and logos
Text elements, etc.
On the other hand, the right-side panel stores features like
Layers
BG remover
Text edits
Shadows and reflections, etc.

For example, let’s say you want to exchange the chair picture from the photo above. Just click on Glorify’s stock image icon and choose the object you want to replace it with.

Using the features from the left-side panel, you can additionally tweak the photo and change the text.
Since you are creating a LinkedIn business page cover, you may also want to use your brand colors or your logo. You will find the option for this in the right-side panel.

You can customize the colors and once you have your combo, just click on it, and it will automatically be applied to your image.
For example, in the picture below, you can see what happens if you click on the Chrome combo.

You can now continue to add the elements until you are satisfied with the result.
The best thing is that everything really takes a click or two.
Step 3 Save Your Design
Once you’ve finalized your design, you can share it or save it and export it into multiple formats. We promised to share more details about Glorify, so let’s see what other useful features Glorify has to offer.
What are Glorify’s Highlights?
Glorify is indeed a versatile platform. The best indicators for that are its features.
Infinite Canvas - Provides a limitless canvas where you and your team can ideate, do strategy planning, get creative, organize your assets, etc.
Mockup feature - Great for designers and eCommerce store owners to help them showcase their products in a 3D and realistic way.
Annotation tool - Helps highlight the best features of a product, but it is also useful for creating diagrams and flowcharts.
Photo editing tools like Smart Resizer, BG remover, Shadows and Reflection, etc. help you tweak and edit your photos to make them unique.
Brand Kit - Enables you to centralize your brand assets and logo and stay consistent across all the campaigns and platforms.
Share your design - Allows you to add feedback and comments and export your files in multiple formats.

All of these features can help you improve your product images, raise brand awareness and boost marketing efforts.
Overall, Glorify is much more than just a graphic design tool.
Wrapping It Up
Banners are an essential part of your company’s business profile. Thus, plan them thoroughly, paying attention to the ultimate message you want to convey.
Think about your audience and your brand voice and try to reflect that in your banner image.
Since that will take a lot of brainstorming and effort, then at least create them in a hassle-free and quick way.
Sign up for free on Glorify so you can create professional-looking LinkedIn banners starting today.


Features
Alternatives


© 2019-2024 Glorify App - All rights reserved.